Reconstructing images with Brush and COLMAP
Recently I have been experimenting with different ways of rendering images into a 3d workspace. I have tried all sorts of different tools, but Brush stands out among them as being both easy to get started with, while also not sacrificing on quality or speed.
Reconstructing your images
Brush has one disadvantage compared to other rendering engines: it can only render already reconstructed images. To do that, we will need another tool called COLMAP.
-
To download COLMAP, head to this link. Download either the CUDA or non-CUDA version depending on if you have an Nvidia GPU. Alternativelly if you are running linux you can use the official guide linked here.
-
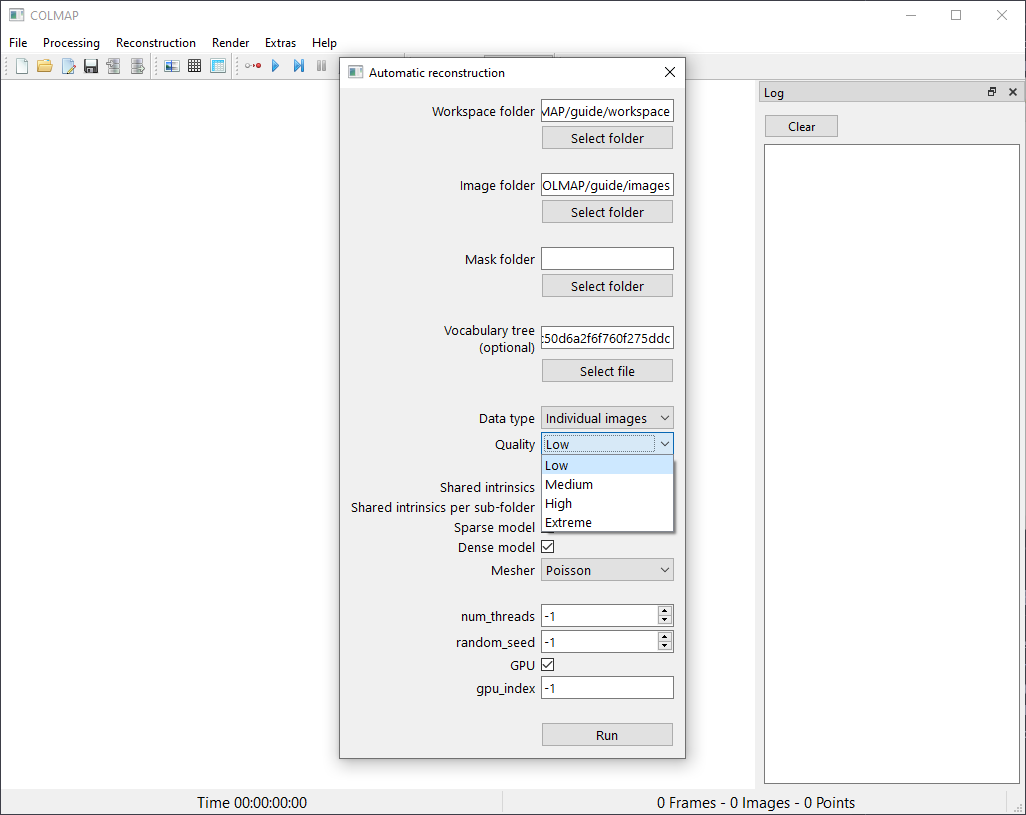
Open colmap.bat and click on the "Reconstruction" menu and select "Automatic reconstruction". You only want to specify 2 folders here, The Workspace folder and the folder with your source images. (Keep in mind COLMAP only supports OpenImageIO formats like JPG and PNG). Leave everything else at it is and press run.
If you did everything correctly, it should restructure and look like this.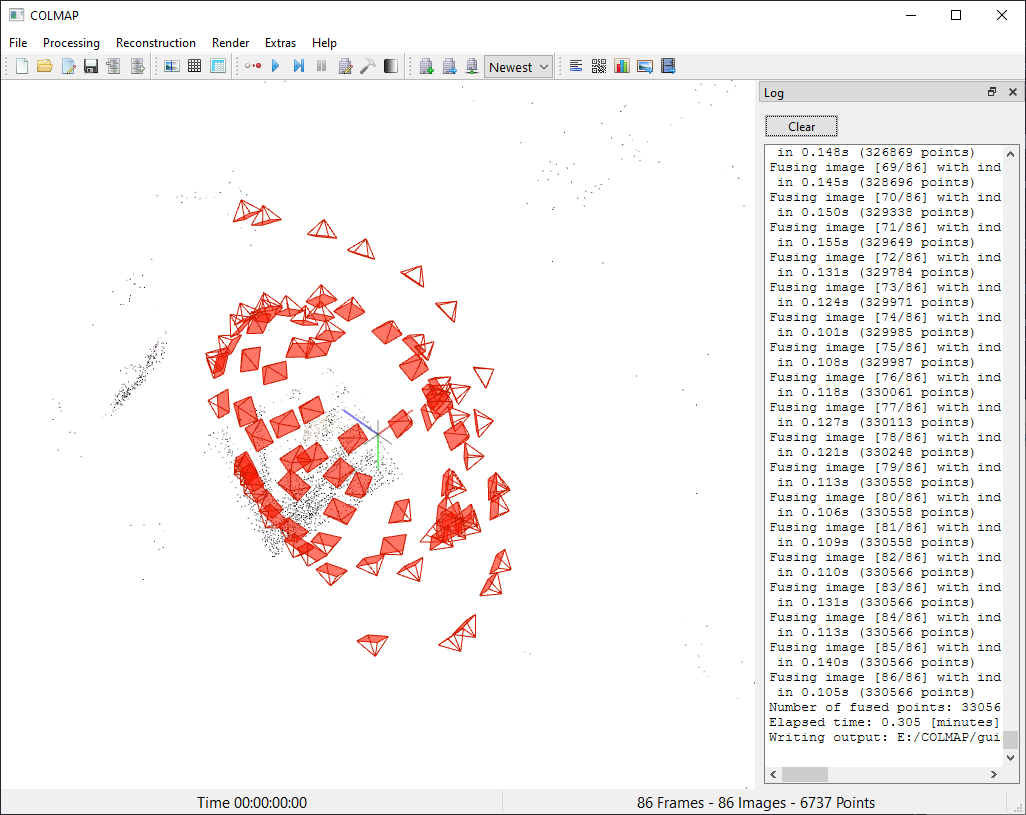
Setting up Brush
-
Download Brush from this GitHub repo.
-
After opening it should load you into a very simple GUI. To open your freshly reconstructed images, click on "Directory and select the Workspace folder you specified in COLMAP. It should have two folders inside like in the image below, Do not click on them and just press "Select Folder".
 It should now open a settings
menu. For a first try I would reccomened leaving everything at default and pressing
"Start".
It should now open a settings
menu. For a first try I would reccomened leaving everything at default and pressing
"Start".  It might take a bit for your project to render depending on which quality you selected. After it's
rendered, you are pretty much done. (Shoutout to my awesome girlfriend for providing me with the sample
images for this guide)Now you can export your project by clicking
"Control" arrow right below "Scene" and click
"Export".
It might take a bit for your project to render depending on which quality you selected. After it's
rendered, you are pretty much done. (Shoutout to my awesome girlfriend for providing me with the sample
images for this guide)Now you can export your project by clicking
"Control" arrow right below "Scene" and click
"Export".
Conclusion
In the beginning I found all of this to be pretty confusing and scary but as this guide hopefully proved rendering images into a 3d workspace is not at all daunting but actually pretty easy if you take just a little bit of time to learn the basics. Also this is the first ever article I wrote so I am open to any critiques and suggestions.